Project structure
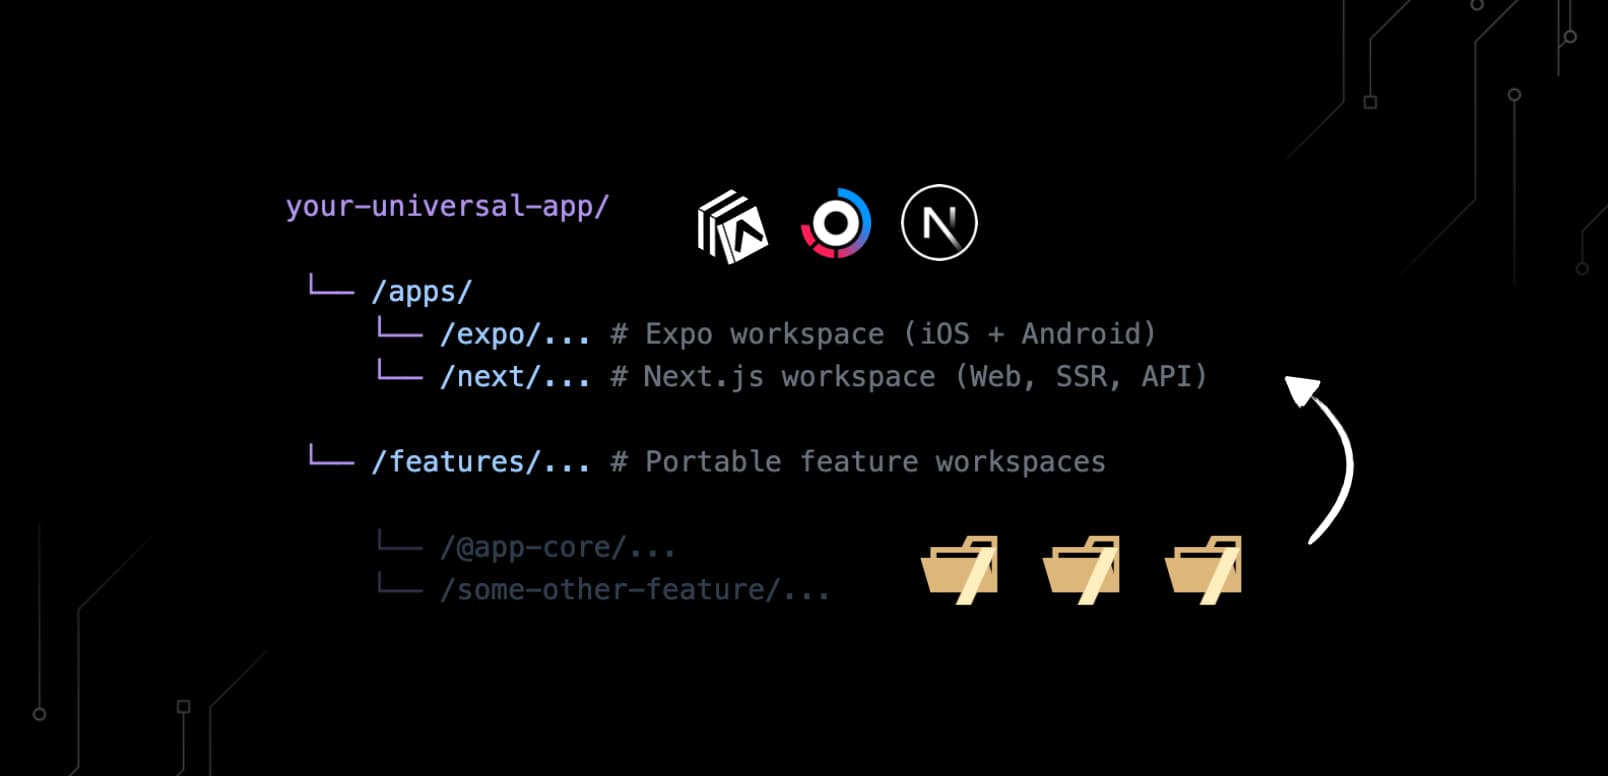
your-universal-app/

 └── /apps/
     └── /expo/... # Expo workspace (iOS + Android)
     └── /next/... # Next.js workspace (Web, SSR, API)

 └── /features/... # Portable feature workspaces

     └── /@app-core/...
     └── /some-other-feature/...

 └── /packages/... # Portable package workspaces

     └── /@green-stack-core/...
     └── /some-utility-package/...
Why not just a single workspace?
There’s two main reasons why the starterkit is structured this way:
-
Historically, using a monorepo for combining Expo & Next.js was better as you could keep their configs and dependencies separate. Meaning you can configure and upgrade Expo without upgrading Next.js and vice versa. This still holds true for the most part.
-
It facilitates architecting for copy-paste. A workspace folder within a monorepo is the ideal unit of work to copy and paste between projects. You define your custom code and the dependencies it needs in a single folder, and can then consume it in another workspace. Colocating the UI / API / models / schemas / utils / constants / resolvers / components / hooks for a single, portable, feature.

Monorepo workspaces

Note on terminology
We tend to mean “package workspace” when we mention ‘workspace’, as defined by Vercel in their glossary:
“A collection of files and directories that are grouped together based on a common purpose. Types of packages include libraries, applications, services, and development tools.”
“This modular approach is essential to monorepos, a repository structure that houses multiple interconnected packages, facilitating streamlined management and development of large-scale projects.”
“In JavaScript, each ‘package workspace’ has a
package.jsonfile at its root, which contains metadata about the package, including its name, version, and any dependencies.”
Feature workspaces
You’ll likely write most of your app code in feature workspaces. These are subfolders of the /features/ folder.
The main one is called @app/core. You could write your entire app in this workspace, but that would defeat the purpose of making your app features modular and portable.
Instead, consider units of work that you’ll likely need in other projects. Some good examples may include:
your-universal-app/

 └── /features/...

     └── /@app-core/...

     └── /admin-panel/...

     └── /blog-engine/...

     └── /forum/...

     └── /roadmap/...
Each of these might have specific routes or route-segments, data shapes, components and business logic that’s mostly the same across projects.
Think of these as the main sections of your app that would feel like either bloating the @app/core workspace, or that you know you’ll reuse later in another project.
Package workspaces
Package workspaces are less defined by features and more focused on utility. They’re the place to put code that you’d like to consume across feature workspaces. Kind of like an NPM package, but local, editable and portable.
A common usecase will likely be driver-like behaviour, e.g.
your-universal-app/

 └── /packages/...

     └── /@db-driver/... # <- e.g. main db driver, import as '@db/driver'

     └── /@db-mongoose/... # <- '@db/mongoose' as a driver option

     └── /@storage-driver/... # <- '@storage/driver'

     └── /@storage-uploadthing/... # <- '@storage/uploadthing'

     └── /@payments-stripe/...

     └── /emails/...
Workspace structure
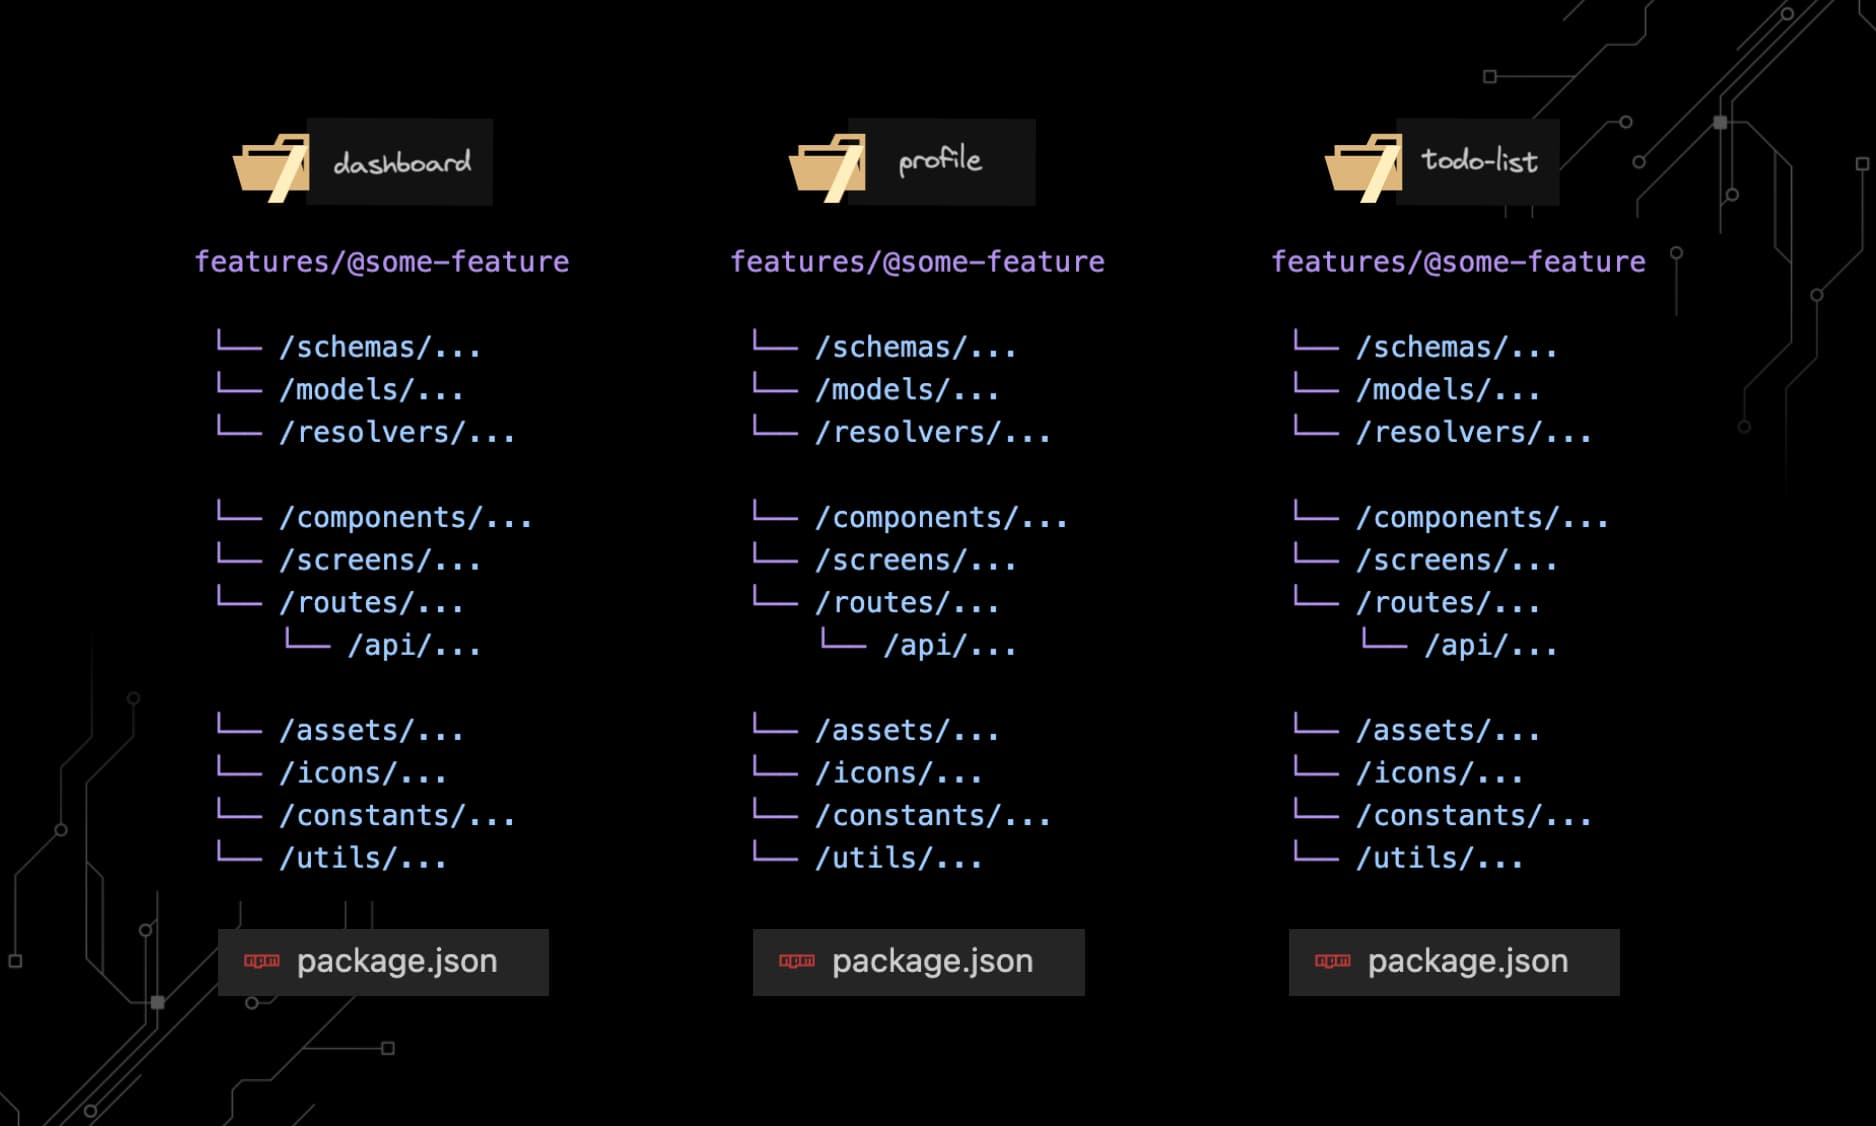
We recommend sticking to a similar structure for each workspace:
features/some-feature

 └── /schemas/... # <- Single sources of truth
 └── /models/... # <- Models / collections based on schemas
 └── /resolvers/... # <- Reuses models & schemas

 └── /components/...
 └── /screens/... # <- Reuses components
 └── /routes/... # <- Reuses screens
     └── /api/... # <- Reuses resolvers

 └── /assets/...
 └── /icons/... # <- e.g. svg components
 └── /constants/...
 └── /utils/...

 └── package.json # <- Name the workspace, manage dependencies
Each folder that follows this structure should have its own package.json file to define the package name and dependencies. This way, you can copy-paste a feature or domain from one project to another, and your JS package manager + bundler + runtime will have it work out of the box.
Here’s what this might look like in the full project.
Don’t hesitate to open the /apps/, /features/ or /packages/ folders:
There are two main reasons for this recommended structure:
-
✅ Group server and client code together in the same workspace so there’s no big split between front and back-end folders. If we did do a front-end back-end split, you’d have to copy-paste multiple files to different destinations, as well as manage feature dependencies in two different places.
-
✅ It’s predictable. Anything that’s predictable can be used in automation, scripts and generators, which can further speed up your development in the long run.
Aside from /schemas/, /models/, /resolvers/, /routes/ and /icons/, we have no automations related to the other folders. The names are just suggestions, and you can rename, add or split as you see fit.
Turborepo Basics
The tool we use to manage the monorepo is called Turborepo.
It’s a wrapper around package manager (npm / yarn / pnpm) workspaces that adds some extra features.
Most importantly, Turborepo goes out of its way to get out of your way:
- Does the least amount of work possible
- Tries to never redo work that’s already been done before
- Caches tasks and results to speed up subsequent runs on your local machine
You can also share your cache between teams and projects to speed up CI builds.
Minimum requirements
- Specifying packages in a monorepo
- A package manager lockfile
- Root
package.json - Root
turbo.json package.jsonin each feature / package / app workspace
All of this is already set up in the starterkit. However, you might want to keep this in mind when creating new feature or package workspaces.
Configure tasks with turbo.json
The root turbo.json file is where you’ll register the tasks that Turborepo will run. Once you have your tasks defined, you’ll be able to run one or more tasks, e.g.
turbo run lint test build workspace#specific-script-nameWhich would run the lint, test and then build tasks in all workspaces, as well as run the “specific-script-name” task in the “workspace” workspace. All in parallel, unless we define otherwise:
https://turbo.build/repo/docs/crafting-your-repository/configuring-tasks
Have a look at the
turbo.jsonin the root of the starterkit to see how we’ve set up the tasks for this project.
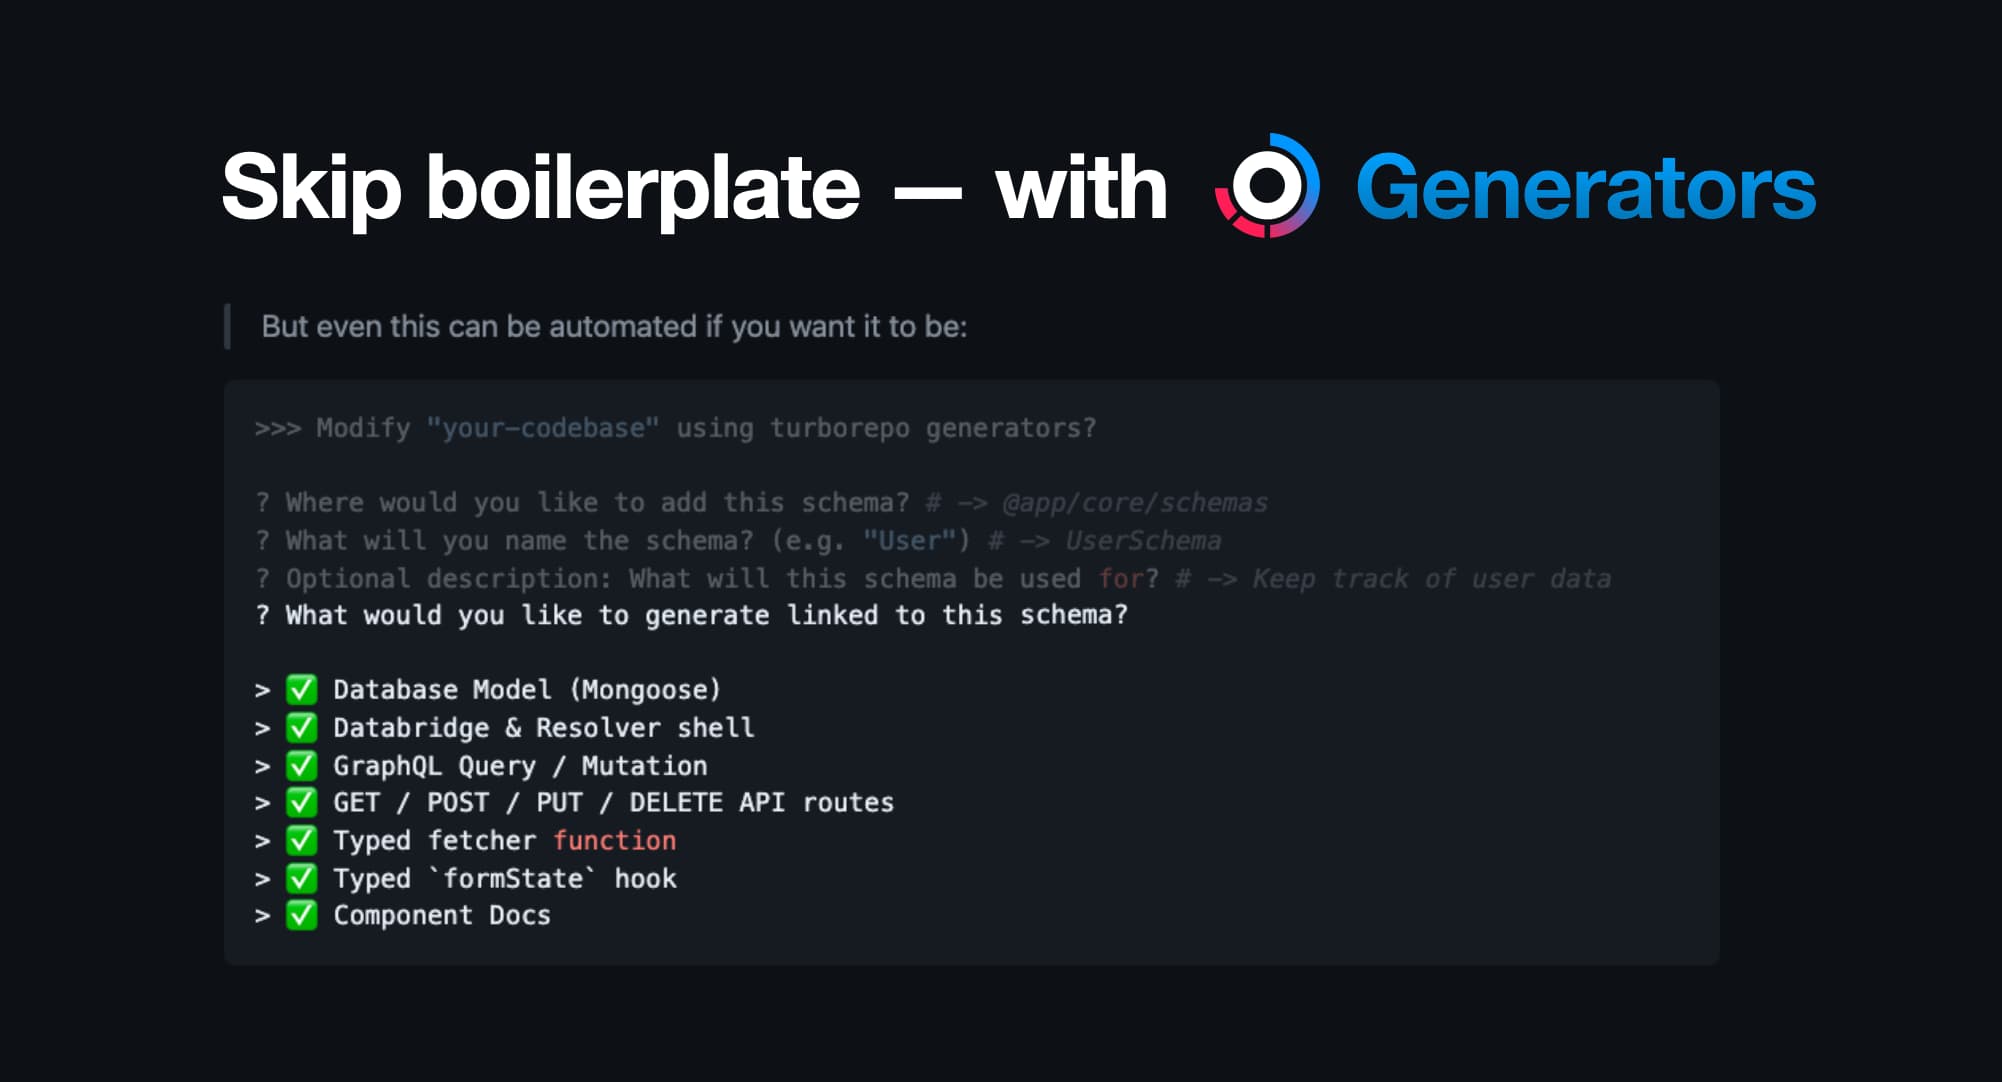
Speed up development with Turborepo generators

Turborepo comes out of the box with a code generator system.
For example, to add a new workspace interactively, we’ve added a generator:
npx turbo gen add-workspace
# or `npm run gen add-workspace`
⬇⬇⬇
>>> Modify "project name" using custom generators?

? what type of workspace would you like to generate?

❯ feature
  package
Depending on which other plugin branches you’ve merged, there may be other generators available to you.
To check which generators are available:
npx turbo gen # interactive list to pick from>>> Modify "project name" using custom generators
? Select generator to run (Use arrow keys)
❯ add-dependencies: Install Expo SDK compatible deps
add-workspace: Create new feature or package workspace More about FullProduct.dev specific generators on our generators page.
The registry pattern
Ofcourse, any portable code you write in an isolated workspace is useless if you ultimately can’t tie it all together in your apps or core features.
That’s where the registry pattern comes in:
- Collect different exports from separate workspaces
- Re-export the most important parts in a single place.
This is done in the @app/registries workspace:
your-universal-app/

 └── /packages/...

     └── /@green-stack-core/...

         └── /scripts/... # <- Scripts to collect files from workspaces

     └── /@registries/... # ⬇⬇⬇ Collection of generated files from other workspaces

         # Drivers - e.g. result of `npm run collect:drivers`
         └── drivers.config.ts # driver enums & types
         └── drivers.generated.ts # barrel of drivers

         # Barrel file of DB models - `collect:models`
         └── models.generated.ts

         # Turborepo generators - `collect:generators`
         └── generators.generated.ts

         # GraphQL resolvers - `collect:resolvers`
         └── resolvers.generated.ts

         # Next.js route list - `link:routes`
         └── routeManifest.generated.ts # types for Link component

         # Workspace helpers - `check:workspaces`
         └── workspaceResolutions.generated.js
         └── transpiledWorkspaces.generated.js # used in next.config
The
npm run devscript will run all the necessary scripts to collect to rebuild these files automatically.
The glue when designing features for copy-paste
This pattern is what facilitates the copy-paste design of workspaces in this starterkit. It allows you to build a feature in isolation, defining its own routes, UI and logic. Then you use the registry to plug it into your app to make it work, and be typesafe.
For example, how our Link component knows about all the routes in the app:
your-universal-app/

 └── /packages/...

     └── /@registries/...

         # Types for Link component
         └── routeManifest.generated.ts # list of possible routes

     └── /@green-stack-core/... # ⬇⬇⬇

         └── /navigation/...
             └── /Link.ts # <- Used here to provide editor hints
In the other docs, we’ll dive deeper into what each of these registries is used for.
Further reading
Workspace Drivers
FullProduct.dev comes with an entire workspace based driver system:
- Add a layer of abstraction on top of different provider options
- Change underlying providers without refactoring much if any code
- Plugins with workspace drivers for Auth / Payments (e.g. Stripe) / etc…